Spinach and Feta Stuffed Breakfast Crescents

These are one of my absolute favorite things to make for parties, the kids, or just on a regular weekend morning.  They are easy, have endless variations, and pretty much appeal to everyone.  Also they are pretty cheap and feed a lot of people.  I made them last summer for Alice's Baby Shower Brunch and they were a big hit, I also make them on Sunday and freeze some and they are great for handing to the kids in the stroller when Chanel and I go for our morning runs. 

All it takes is one (or two or three) tube of crescent roll dough, eggs, cheese, a veggie and you are set to go.  The spinach and feta variety are my favorite: sometimes there is added sun-dried tomatoes.  Aaron likes to make them more reminiscent of a Kolache - eggs, cheese and bacon or jalapeno sausage.  Just chop up your fillings (spinach and tomato), whisk your eggs with a bit of half-and-half and then make a scramble.  Toss the cheese in at the very end so it melts, but doesn't burn.

Heat up your oven and get out a baking sheet.  Lay out the dough on your baking sheet and decide what route you want to go: You can use two pieces and make a pop-tart type pastry, you can just place some on top and roll it up like a crescent, you can even just bundle one together and make a little ball.  I think the crescents present the best, you can see the filling poking through the sides and they look pretty all stacked up on a plate together.  On the other hand though, for the kiddos, its nice to have everything contained so the pop-tart style might be a little less messy.

Spinach and Feta Stuffed Breakfast Crescents

Ingredients:

Makes 8 Rolls

  • 1 can of crescent roll dough
  • 6 eggs
  • 1/3 cup half-and-half*
  • Salt, pepper and garlic powder, to taste
  • 3 cups fresh spinach
  • 1 cup feta cheese crumbles

*I like to use half-and-half or heavy cream when I make scrambled eggs because it gives the scramble a little more volume than just eggs or eggs and water.  However, I don't recommend skim milk or even plain milk because the water seems to separate a bit from the mix and they can be drippy (still tasty, but drippy).

Preheat your oven to 350 degrees.  Line a baking sheet with parchment or a baking mat, set aside. Chop the spinach and set aside.

In a large mixing bowl, whisk together your eggs, half-and-half, and seasoning.  Melt a bit of butter in a frying pan over medium-high heat. Add the spinach and saute for a minute or two.  Pour the egg mixture over the spinach and stir, keeping the eggs from burning but allowing them to cook.

Just as the eggs are setting (so there is just about no liquid left), add the feta, stir together until the eggs are just cooked.  Remove from the heat and set aside.

Open the can of crescents and pull each triangle apart.  Using a spoon, place a large spoonful of the egg filling in a line down the middle of the crescent and then roll it up from the wide end.  Place the filled dough on the baking sheet.  Repeat with remaining dough.

Bake the crescents in the oven for 5 minutes.  Watch them carefully so they do not over brown.  Depending on your oven, they may need a little longer, but I would just watch them carefully.

Roasted-Banana Zucchini Muffins

These muffins are a huge favorite of mine this time of year for a couple reasons: 1) anyone who has a garden has tons of zucchini, 2) they taste a bit like fall and 3) they are a super easy breakfast to hand my kids when we are inevitably running late to school drop-off.  They also make great lunch "desserts" that have fruit and vegetables in them.

I don't think roasting the bananas is absolutely mandatory, but highly recommended.  They blend in so smooth and the roasting brings out all the goodness of the banana flavor.  The sour cream can also be substituted with plain or vanilla yogurt if you have to - vanilla yogurt will yield a little bit sweeter muffin, but each time I have had to just use what I've got they have come out just fine.

Aaron has also suggested that I add a crumble topping or toss in some chocolate chips.  I do make a crumble topping for my banana bread and its wonderful, so I will include that recipe too in case you want to sweeten these up.  I have yet to add chocolate chips though, but I'm sure it would be wonderful!

Roasted-Banana Zucchini Muffins

Yields 12 standard muffins or 6 jumbo

Ingredients:

  • 2 ripe bananas
  • 1 cup shredded zucchini, about 1 medium/small zucchini
  • 1/4 cup sour cream
  • 1 tsp. baking soda
  • 1/4 tsp. salt
  • 1/2 cup (1 stick) butter, softened
  • 1 cup granulated sugar
  • 2 eggs
  • 1 tsp. vanilla extract
  • 1 1/2 cups all-purpose flour
  • 1 tsp. cinnamon
  • 1/4 tsp. each of ground cloves, nutmeg, and ginger (you can also use 1 tsp. pumpkin pie spice)

Preheat your oven to 425 degrees.  Butter a baking sheet and slice your bananas length-wise and place them on the baking sheet.  Roast in the oven for 8-10 minutes, until bubbly and fragrant.  Remove and allow to cool on the baking sheet.  Set aside.

Lower the oven to 350 degrees. In a small bowl, combine the sour cream, baking soda and salt.  Mix and set aside.

In a large mixing bowl or the bowl of a stand mixer, cream the butter and sugar until fluffy.

Add the roasted bananas, include as much of the syrupy juice from the baking sheet as you can.  Mix until well combined.

Whip in the eggs and vanilla, until smooth.

Add the sour cream mixture and combine. The sour cream mixture will have puffed up a little from the reaction between the baking soda, salt and cream.

Stir in the zucchini.  Finally, mix in the flour and spices until you have an even batter. 

Distribute the batter evenly among a lined 12-cup cupcake pan.  I use two cupcake liners per cup because I feel like it prevents the bottoms of the muffins from browning too quickly.  If you are topping with crumble, put the topping on now.

Bake for 20-25 minutes until golden brown (add five minutes or so if you are baking jumbo muffins, a toothpick should come out clean).

Crumble Topping

Ingredients:

  • 3 tbs. butter, melted
  • 1/4 cup granulated sugar
  • 1/2 tsp. cinnamon or pumpkin pie spice
  • 1/3 cup of flour

Combine all the ingredients in a small bowl.  When the butter is cool enough to touch, use your fingers to crumble it into pea-sized pieces.  Top the muffins with equal amounts before baking.


King Ranch Chicken Casserole

Until I moved to Texas I didn't eat a lot of casseroles, I'm gonna be honest.  Excluding baked ziti and lasagna, I don't think my mom just ever made any.  Turns out, I was missing out on some pretty awesome, easy to make, fantastic casseroles. 

Another thing I had missed out on, but have since converted to the church of, is the crock pot.  So truthfully, when I find a recipe that uses the crock pot and is a casserole, I pretty feel like I knocked it out of the park. That's exactly what this King Ranch Chicken recipe is. 

Truthfully, I also didn't know what King Ranch Chicken was before I moved to Texas.  If I had tried to guess from the name I would have though it was some kind of giant chicken breast, seasoned with a packet of Ranch dressing. But I was introduced to this amazing Texan Lasagna when I was the Curriculum Coordinator at a preschool in Round Rock and our super talented chef, Kathryn, would make the kids King Ranch Chicken.  She fed it to me once, when I was dying of morning sickness and it was my savior.

Kathryn's recipe, however, would not be easy for me to replicate since we are a family of 4, not 140, so the proportions might be off.  Also, I'm not particularly a fan of using cans of condensed soup for the base of recipes.  They can be very high in sodium and I'm not really a fan of the taste.  So when I came across a recipe for a completely from scratch version on Five Heart Home and gave it a shot and liked it a lot.  This is my tweaked, crock-pot-added, mushroom-optional version.

IMG_5065.JPG

King Ranch Chicken Casserole

Serves 6

INGREDIENTS:

For the Chicken:

  • 4 skinless, boneless chicken breasts
  • 3-4 cups chicken broth
  • 2 tbs. garlic powder
  • 2 tbs. adobo seasoning
  • 1 tsp. chipotle powder
  • 1 tsp. cumin
  • Salt & pepper

For the Sauce:

  • 6 tbs. butter
  • 4-6 oz. baby portabella mushrooms, diced small (optional)
  • 6 tbs. flour
  • 2 cups of chicken cooking liquid from crock pot
  • 2 cups milk
  • 1 tsp. garlic powder
  • 1 tsp. adobo seasoning
  • 1 tsp. cumin
  • 1/2 tsp. chipotle powder
  • Salt & pepper

For the Casserole:

  • 10 small corn tortillas
  • 4 cups shredded cheddar cheese, or jack blend
  • 1 cup of chicken cooking liquid from crock pot
  • 1 small can Rotel
  • Diced jalapenos (optional)
  • Fresh cilantro or parsley, chopped (optional)

In the bowl of your crock pot, cover the chicken with the chicken broth and add the seasoning.  Stir to coat the chicken and cook on high for 4-6 hours, until the chicken comes apart easily with a fork.  Once the chicken comes apart easily, roughly break apart the chicken breasts into smaller pieces to cook for 15 more minutes on high (I feel like the smaller the pieces the moister the chicken).

Remove the chicken from the crock pot with a slotted spoon and set aside to cool.  Turn off the crock pot, allow the remaining broth to cool and set aside.

Meanwhile, make the sauce.  Melt the butter in a saucepan over medium-high heat.  If you are using the mushrooms, sautee the mushrooms in the melted butter for 3-5 minutes, until cooked.  If omitting the mushrooms, just skip ahead.  Add the flour to the butter and whisk until blended.  Do not allow this to burn.

Add the milk and 2 cups of broth (from the crock pot) to the sauce and whisk until smooth.  Whisk in the seasoning and bring to a boil, then remove from heat and set aside.

Using two forks, shred the chicken as fine as possible.  Pour the sauce over the chicken and mix together.  Set aside.

Butter a rectangular baking dish.  Pre-heat an oven to 350 degrees. Assemble all the components of the casserole within easy reach (tortillas, chicken mix, remaining chicken broth, shredded cheese, drained Rotel and optional toppings).

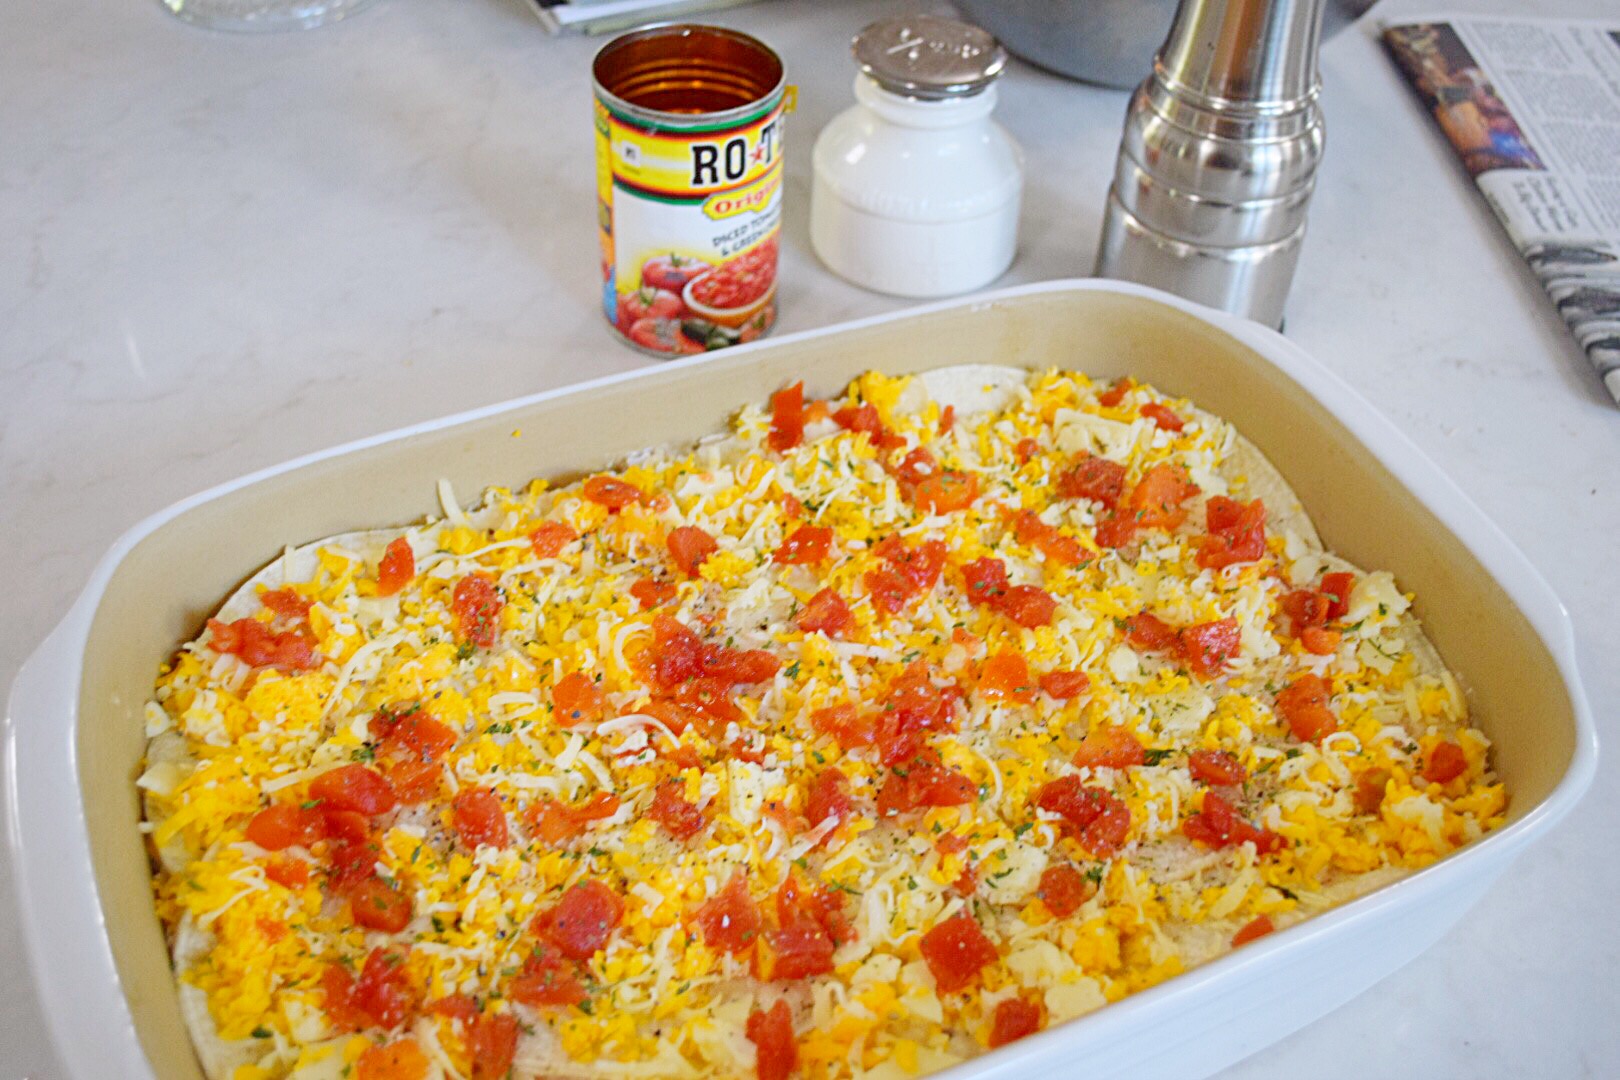
Spread half of the chicken mix in the baking dish, top with shredded cheese, some Rotel and jalapenos.  Cover with a layer of tortillas.  I tear mine in half to make sure they cover every inch, overlapping is fine.  Drizzle some of the chicken broth over the tortillas, making sure to get the edges.

Top with the remaining chicken mixture and another layer of tortillas.  Top the tortillas with cheese, Rotel and other optional toppings. 

Cover with aluminum foil and bake for 15 minutes.  Remove the foil and bake until bubbly, about another 15 or 20 minutes.

Back to School Time: Pimento Cheese Sandwiches

It is completely crazy that summer is already over! Well, its not, we are still going to suffer through weeks more of insane heat, long days, and sad, dry lawns.  Yet, back to school the kiddos go next week.  I can't believe it.  Townes has been in school for a year now, so for him, I'm so excited to get him back and just let him have a great time and watch him grow.  For Hondo though, I am struggling a little bit with my sweet baby leaving me already.  

I'm being a little dramatic.  They don't even go to school for a full day.  Or a full week.  They go twice a week for four hours.  But still, he's my sweet little baby and I just can't believe its already been a year since he was born and he is going off to school.  He, on the other hand, is probably super excited (if he had any idea what was going on) because he loves other kids.

While I am stressing out a little that in just seven days my babies will be leaving me, the silver lining is that I got to go pick out a cute new backpack for Hondo to tote his lunch in, Townes gets a new lunch box (because one year was enough for the last one), and I will be more motivated to actually make dinner every night.  Why?  Because last night's dinner is almost always what my kids eat for lunch.

I have a pretty simple formula for packing lunch: 1) a protein, a.k.a. last nights chicken, 2) a fruit, 3) a little something crunchy, like pretzels or granola.  Sometimes I get crazy and toss in a cheese stick.  I almost always include a vegetable, but thats often encased in the category of last night's dinner too.

However, there are a couple of staples that I try to keep on hand in case we did something like actually finish the entire meal I cooked the night before, or went out to eat.  It's always great to have the fixings for a simple PB&J or grilled cheese, a carton of yogurt, and our family favorite: pimento cheese.

Aaron has always made the Pimento cheese around here and its so simple and easy.  The recipe makes a lot and it keeps very well.  I often make it on a Sunday during the school year, and just keep it in the fridge all week.  Townes will eat it on bread, out of bowl with pretzels for dipping (his favorite), or even fancied up in a grilled cheese.  I even have used it for entertaining and whipped some up with hard-boiled egg yolks and a little mayo and made Pimento Cheese Deviled Eggs, like I did for Alice's Baby Shower last July.  They were a HUGE hit.

It doesn't take many ingredients: cream cheese, cheddar cheese, pimentos, jalapenos, and a little cayenne.  Literally, just throw them into the bowl of stand mixer and whip it up.  Spread some onto some home-made sandwich bread, put mayo on the outside, grill, and enjoy!

Aaron's pimento Cheese

Yields about 3 cups

ingredients:

  • 16 oz (2, 8-oz blocks) of cream cheese, room temp
  • 16 oz block of cheddar cheese, freshly grated*
  • 4 oz diced pimentos, drained
  • 4 oz diced jalapenos, drained (or more, to taste)
  • Salt & Pepper
  • 1/2 tsp. Cayenne pepper (or more, to taste)

*I think its important for a recipe like this to use freshly grated cheese rather than a bag of pre-shredded if you can.  Pre-shredded cheese has a coating of powder that prevents the shreds from sticking together and clumping in the bag and it helps the shreds keep their shape.  This makes the cheese rather dry, in comparison to a freshly shredded block.  This moisture is important because it helps the cheese blend into the cream cheese well and makes for a smoother final product.*

In the bowl of a stand mixer combine the cream cheese and cheddar cheese.  Mix on medium speed until well blended.  Add the remaining ingredients, mix until combined.


Homemade White Sandwich Bread

Lunch is probably my worst meal.  I love breakfast, and it inspires me, I could wax poetic about breakfast foods.  Dinner is my best friend, the world is your oyster for options.  But lunch?  Meh.  I stall out. No one really eats lunch in this house for that reason - we don't have things to eat for lunch.  Lunch is really more of a makeshift snack.

So when I go over to my friend Ashley's house and she just whips up a gorgeous turkey sandwich or pops out hummus and pita chips and veggies, I sit in awe.  Lunch is my nemesis.  If someone came over to my house at lunch and expected something other than a cheese stick and some Pirate's Booty they would be disappointed. 

The last time I was over at Ashley's, our kiddos were playing and she offered them sandwiches and then casually said, "I need to make more bread this week."  What? Her family gets to eat lunch and its on homemade bread. I know where I'm gonna be finding my kids in a few years...

In any case, it got me thinking that I can make a lot of things, like a lot.  I shouldn't be defeated by plain old white Wonder bread.  We never have any because whenever I buy it, we use a third of the loaf and it gets moldy and thrown away.  So I decided to take a stab at it, fell back on trusty Julia Child for a recipe and voila! 

This bread is seriously so tasty.  I keep thinking of ways to feed my kids and husband things on bread because its so good.  Hell, I ate like three slices when it came out of the oven with just melted butter on it.  Who knew fresh baked sandwich bread smelled so good and tasted like heaven (okay, probably anyone with a nose, but whatever)?

I've now made it a couple times and tried mixing things up a little: I tried it with a full-on wheat flour substitution and it was a bit dense, I tried adding 50% more yeast and halving the wheat/white ratio and that was more successful, but the fluffiest, tastiest variation is just how it is.  No adjustments needed.

A quick couple of notes for bread beginners though:

1. A packet of yeast is apparently not 1 tablespoon, despite me dumping it into the measuring spoon and saying, eh close enough.  It's only 2 and 1/4 teaspoons, which leaves you 3/4 teaspoons short of a full tablespoon.  Don't make this mistake.  Open a second packet and measure out the missing 3/4 tsp.  

2. Make sure not to add the salt until after you have added flour and mixed it well into the yeast.  Salt directly mixing into your frothy yeast will kill it and ruin everything.

3. The rise time is less important than the size of the dough.  This means, as explained to me by my Noni, that if the recipe says for your dough to rise 30 minutes until doubled in size, if its not twice as big in 30 minutes, wait until it is.  If it's twice as big in 15 minutes, proceed to your next step because it will rise, crest and then fall.  The rate at which bread will rise has to do with three main things, the activity of your yeast, the temperature of the air and the humidity of the air.  So regardless of what the recipe says, its a guideline, not a rule.  In this case, its size that matters.

4. I have dark, non-stick loaf pans and in the past, the bottom of my breads have burned.  So now, to prevent that from happening, if the recipe says to butter or grease the pans (like this recipe does), I do that, but then I also cut a piece of parchment paper to line just the bottom of the pan, then grease or butter on top of that.  Burns no more.

5. Warm water really means hot. Okay, not boiling, but like turn the tap all the way to hot, let it run until its really going and then use it.  These recipes do not mean lukewarm or just not cold.

6. Lastly, if your yeast doesn't froth (like pictured below) its not live anymore and you need to toss it and start over.

Julia Child's White Sandwich Bread

Makes 2 loaves

Ingredients:

  • 1 tablespoon active dry yeast
  • 1 tablespoon granulated sugar
  • 2 1/2 cups warm water
  • 6 cups all purpose flour
  • 2 tsp. salt
  • 1/4 cup (1/2 stick) butter, softened

In a large bowl, or the bowl of a stand mixer fitted with a dough hook, combine the sugar and yeast. Add 1/2 cup of the warm water (reserving the remaining two cups), let it sit for a full five minutes until frothy.

Add half the flour and the remaining water to the yeast and mix until combined.  Add the remaining flour, salt and butter.  Mix well with a dough hook or by hand.  In the stand mixer, it should be mixed smooth after about 7-8 minutes.

The dough should be tacky but smooth.  Remove from the bowl and turn out on the counter to knead with your hands for a minute or two.  Shape into a ball and return to the bowl.  Cover with a tea towel and let it rise for about an hour and a half, until doubled in size.

Meanwhile, butter two loaf pans.  Once the dough has doubled in size, punch it down, remove from the bowl and turn out onto the counter to knead again for a minute or two.  Divide the dough into two, evenly.  

Pat each half into a rectangle about the size of a sheet of paper.  Then fold it into third like a letter, it should now be about the size of the loaf pan.  Put it into the loaf pan, seam side down.  Set the loaf pans aside, cover with a tea towel and let it rise for another hour, until doubled in size, above the sides of the pan.

Pre-heat an oven to 375 degrees and bake the loaves for 20-30 minutes until golden brown.  Remove immediately from the pans and allow to cool on a wire rack.