Grinch Cookies

There are a few things that just scream "Christmas" to me from my childhood - and without a doubt How the Grinch Stole Christmas is on that list.  I read the book as a kid, I watched the movie laying on my Noni's floor in her den at Christmastime, and I could probably recite the whole thing to you now if I tried.  I love to pass on these memories I have a kid, to my own kids, so Townes and I have watched The Grinch more than a couple of times already since Thanksgiving and the book is in our bedtime rotation.  So when he asked me to bake something today - these seemed like the perfect idea.

Aside from being festive, fun and creative, they are also really, really easy to make and don't require much skill or many ingredients!  They are a version of my shortbread cookies (a recipe from my Noni) that I used on Valentine's Day last year - these are almond flavored instead and obviously these are green!

Grinch Cookies

Makes 2 dozen (depending on cookie size)

For the Cookies:

  • 1 cup butter, softened to room temp (very important)
  • 3/4 cup sugar (I used granulated, but powdered is okay too)
  • 1/2 tsp. vanilla extract
  • 1 1/4 tsp. almond extract
  • 2 1/2 cups flour
  • Green food dye (or yellow and blue)
  • 1-3 tbs. shortening
  • Powdered sugar, for rolling
  • Red decorators icing

Preheat your oven to 350° and line two baking sheets with parchment paper or silicon baking mats.  Set aside.

In the bowl of a stand mixer, cream the butter and sugar.  Really beat it until its super smooth and creamy - its basically the whole cookie.  Beat in the vanilla and almond.  Add the flour a half cup at a time and beat until combined after each addition.  If the dough is too crumbly (it will need to hold together like playdough when squeezed in your hands, but should NOT be sticky) add 1 tbs. of shortening at a time.  After each addition make sure you have given it a solid few minutes to beat in and see if its come together enough.

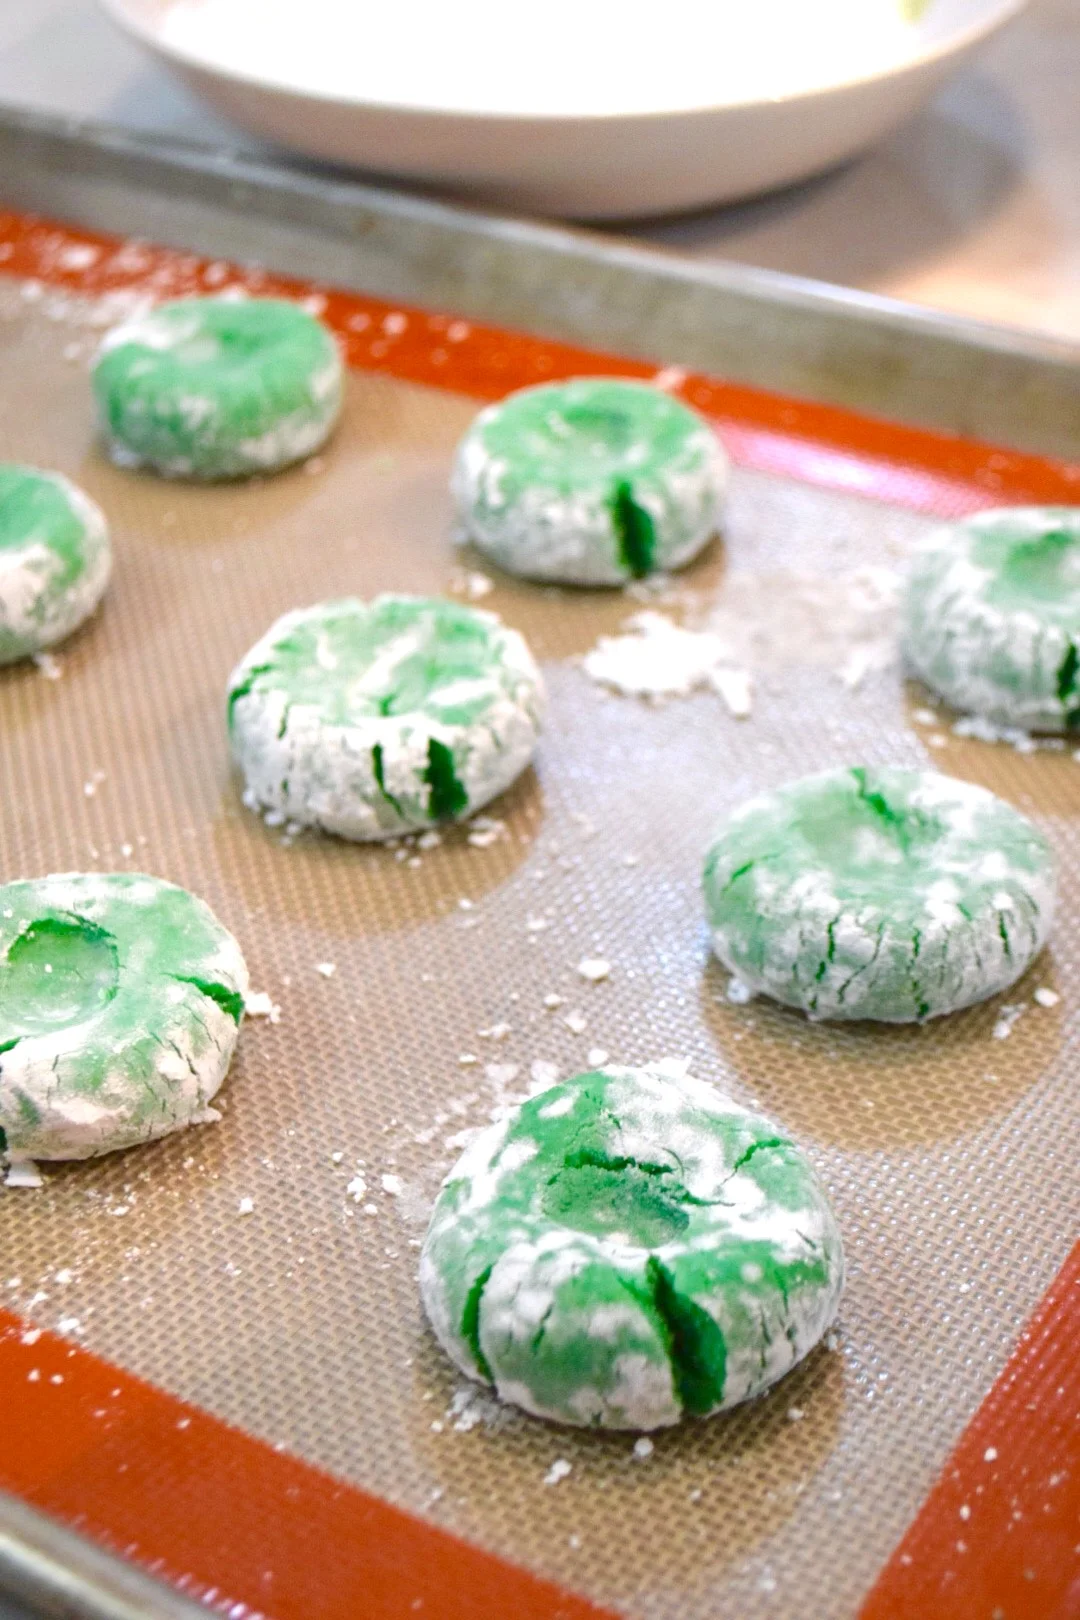
Once the dough is the right consistency, beat in the food dye.  Once the dough is your desired shade of green, scoop out a small tablespoon of dough and roll into a ball with your hands.  Roll in powdered sugar, then place the ball on your cookie sheet and flatten with your hand to about 1/2 inch or thinner. Repeat with remaining dough.

Bake for 12-18 minutes, until the edges are JUST starting to brown (the time will vary depending on the thickness of your dough and the size of your cookie so just watch carefully).  Let the cookies cool completely on the cookie sheet.

Once the cookies are completely cooled, apply the hearts. I used a "leaf" tip on my tube of red frosting and made the heart in two halves.  You can also just use a small round piping tip and draw a heart with the icing.

Baby Chalkboard Updates: Round 2

A while ago I wrote a long post about the monthly chalkboard updates I did for our first son, Townes.  When we had our second son, Hayes (who also goes by Hondo), I wanted to continue the tradition, but also changing it up a little to make it his.  I was also much busier, since I had a toddler running around and a newborn to take care of, so doing two per-month for holidays and milestones was a bit much.  This time around I consolidated my holiday themes into the monthly update when I could instead.

However, the main difference with Hayes' is that instead of using a chair, I drew Hayes right into the picture.  I accomplished this by using the same chalkboard "wall" I had made for Townes during the renovation, and instead of leaning it up against a wall, I laid it down on the floor and then put Hayes down right on it.  Then I photographed him from above.

As always, some of the designs came out better than others, and you can tell it took me a couple months to get into a groove of what works. One big thing that changed was the kind of chalk I used, I found the most fantastic, high pigment chalk from Crayola at Michael's and it changed a lot.  The colors were so much brighter, had more depth and I was able to really expand my creative range.

Its hard to choose favorites, because so many of them are just wonderful memories of my little guy at that age, but my top four are certainly seven months (May/Cinco de Mayo), eight months (June/Father's Day), eleven months (September/Where the Wild Things Are) and his birthday.

My final thoughts on this method are to remember that the chalk will smudge, so be ready to snap your photo the second you put your baby down.  Normally for that reason, I had an extra set of hands (Chanel's) around to help.  I would stand on a chair to get the shot from above, and she would place him down and get him to giggle.  But once he rolled over, we were done.  Also, keep in mind that the little one will get chalk on whatever they are wearing - the high pigment chalk can be a bit harder to get out of light colored clothing - so you've been warned.

For more photo tips and editing (remember to adjust your white balance when you edit) - see the original post about Baby Chalkboards!

Photo Flipbook Party Invite

Townes' 3rd birthday is coming up next week and it has me, as most mom's do, thinking back on his first birthday and how much he has grown.  I love throwing parties and so when his first birthday came around I was just tickled to throw my very first kid's party.  I had probably started thinking about it from the day I got him home from the hospital honestly, just casual thoughts about what we could do.

Its hard to pick a theme for a one-year olds party because, let's be real, they don't really have interests.  I mean, sure they are into food and toys and sleeping, but who isn't and anyway, those things don't really make for much of a party theme (though now that I've said that, I'm starting to wonder if I couldn't throw an adorable "nap themed" party for a baby - stay tuned, I'll work on it - I'm thinking some sheep and clouds and cozy blankets....)  Shit, sorry, I digress.

Townes' first birthday wasn't shaping up like I thought it would because first of all, we weren't living in our house.  We were four months into our HUGE remodel and living in a rental so I already felt disjointed.  Also, I hadn't anticipated how bummed I would be at the idea that all of my family probably wouldn't be there since they live in New York, California, Washington and elsewhere that isn't here.

However that is where I got the theme, in missing my NY family, I decided Townes' birthday could still pay homage to them in some way and so we did a NY theme with T, starring as King Kong.  We had Nathan's hot dogs, hot pretzels, and a popcorn bar. There was a King Kong pinata and a custom made cake to look like a skyscraper for King King Townes' to smash (it was the Frost Tower, which is here in Austin, so we had a little Texas sprinkled in).  I even made favors for everyone to take home that were "bagels in a jar" - I filled large mason jars with all the dry fixings to make homemade NY Style Bagels, topped them with a cute label that said I Heart NY and a tag with the recipe and instructions.

The crowning jewel of this party theme though was the invitation.  We had an adorable black gorilla costume for Townes and we decided we wanted to make a video of him walking through towers of cardboard blocks and knocking them down - that idea ended up posing a few problems: 1) he couldn't walk yet, 2) what exactly would we do with said video, and 3) he was having no part in any of it at all, just wanted the damn gorilla hat off.

After some more brainstorming and discussing, Chanel and I decided to scrap the video idea and make a flip book.  At the time the plan was to give them out as favors to people at the party.  So we dressed him back up, set up the blocks and tried again, this time rapid shooting stills with our camera.  No luck again.  He wouldn't cooperate.

Back to the drawing board, one last time.  We went back to something he knew.  Since he had been doing his chalkboard photos for a year we knew he would cooperate that way.  So we drew the skyline of Austin (another subtle nod to his hometown) on the board and tried to get him to walk in front of it.  Nope.  Finally we gave him his chair and a banana (his favorite snack) and went with what made him happy.  SUCCESS!

Then when I started making the flip books I thought, I should mail them to the people who can't come - then it occurred to me to just make them the invitation and send them to everyone!  It was adorable and everyone loved it. I chose black envelopes to go with the theme (from Paper Source, as always) and then chose a vintage NY subway map wrapping paper for the liner.  I printed labels for the front of the envelope that invoked a little film making with the washi tape and they were all set!  My favorite part was the little message on the last page, letting everyone know we loved them and that this was a keepsake if they couldn't come, which lots of people couldn't.

Like the idea?  Here are some tips on how to do it yourself - its not hard I promise!

Shooting the Photos

At this point, you can do this with just about any camera.  Most digital cameras, even basic ones will let you hold down the shutter button and will just keep auto-focusing and shooting. We used my Canon Rebel, but you could get the same effect on your iPhone with the Burst feature.

It doesn't have to be anything super planned.  We happened to have a theme, but the book will capture the equivalent of a 5-10 second video.  That's not a lot.  So if there is something you love about your little one (a funny face, the way the laugh, how they eat, anything) it will be a cute flip book.  They just need to be moving.

Lastly, if you can, use a tripod.  If you aren't moving then the frame of the photos will all remain the same and will look best in a book because the only moving part will be your kiddo, not the angle of the photo.  This will also allow you to apply the same edits and crop to the whole batch of photos instead of doing each one individually and hoping they match up - trust me this saves a lot of time.

The Cover

I made the cover using (gasp!) Microsoft Word.  All my graphic designer friends would be appalled (not even would be, T's godfather is a super talented graphic designer and he repeatedly tells me he is) but its software I am comfortable with, already own, and can intuitively figure out since I've been using it since elementary school.  I just pull up a blank publishing document, adjust the page layout to be the size I need (in this case 2 x 3) and then go to work adding text boxes, clip art, and so on.

Then what you need to do is save the page as an image and you are ready to go!

The Book

There are a two ways you can go about assembling the book depending on your time, budget and patience.

THE DIY WAY

This is not the way I ended up going because I was making so many (I used about 45, we sent them to everyone - first kid overkill if you will).  But what you could do is print each of the photos on photo paper, cut them to size, and fasten them together with glue and some thread. 

What you would do is cut each photo out leaving a 1/4 inch border on the left side.  Add two small pin holes in the top and bottom quarters of the border (in the same spot of each photo, like the edge of binder paper).  Stack up all your photos (NOT THE COVER), and apply a little bit of glue using a glue stick on the border and glue them all together in order. Once they are glued together, thread a needle and go in one hole, out the other side and then in the other hole and out the other side, twice around creating a secondary way to hold the pages together.

Finally, attach the covers.  The front and back covers should be printed as one long strip, with enough space in the middle to wrap around the bound edge of the book. Use glue to secure the cover pages to the binding area and you are done!

This is pretty simple, if you are making just a couple, but its A LOT of work if you are making more than like, five. So I went with the other method.

ORDERING THEM PRINTED

Turns out, iPhoto has a flip book option in their projects!  Yes, you can order a flip book directly from your iPhoto!  This was the method I chose.  All my photos were already in iPhoto so I just added my cover photo to my Library, made a new project and followed the instructions.

At the time, you could order them in a pack of three for $9.  Now this is more expensive than lotsof other types of invitations, but I never said this was an exercise in cost-efficiency.  The iPhoto project also allowed me to add the final page of text and that was my favorite part.  I am sure that also with some digging other photo printing apps and sites would offer a similar project.

No-Sew Tufted Bench Tutorial

This is so exciting! My first tutorial on the blog!  Anyone who has been in our house knows that I love to make things myself.  I think it comes from the fact that once I get an idea in my head of what I want in a space, sometimes its hard to find exactly that thing or I'm not patient enough to wait and just keep looking until something close enough comes around.

So far, since we moved back into the house, I have designed and had Aaron build two ottomans for the living room and a new entertainment center/toy storage for the TV and the boy's toys.  He is really great at the woodworking so unfortunately I can't give too much guidance in that department (though I will include pictures when I can).  However, I can tell you all how to upholster things, and even do some sewing projects (I have made curtains and pillows and the like to go in the house and some stuff for the kids).

This project however, has been a long time coming, and I have changed my mind probably 15 times about exactly what I want and how I want it to function.  We remodeled the entire house, but the entry room is the only room that remained more or less the same.  We widened the front door so I could get the strollers in and out easier, but besides that, we weren't able to add anything substantial like a mudroom to help keep the shoe-coat-backpack-keys-etc clutter under control.

The finished product!

The finished product!

I built cabinets in underneath the stairs (they come down right at the front door) for larger items like stroller bags, extra shoes, coats, hats, etc, but its not the most convenient place to put things you use every day.  I thought about a hat rack, or hooks, or bins and so on, but needed to figure out how to make the space as open, neat and functional as possible.

The solution to build a bench made the most sense; it gives everyone a place to put on shoes, drop a back pack, or look out the window at the garbage truck.  It also is just high enough to put some baskets under to corral kids shoes (and keep puppy noses out of) and kick flip flops and sneakers under.  Finally, it also meant I could get rid of the table that was next to the door and replace it with hooks on the wall to organize coats, backpacks, hats and dog leashes (so finally, things weren't hanging over the stair rails anymore.

Hondo exploring the new shoe storage!

Hondo exploring the new shoe storage!

For a while I kept making the design more complicated than it needed to be - I wanted a solid bench, almost like a chest, with a shoe shelf and cubbies for stuff - it got very involved.  But then I was walking by a furniture store with Chanel the other day and saw the most lovely upholsted, tufted bench for the end of a bed and I thought, "That's so pretty! I love it! Where could we use that?"  Well, I immediately thought of the front door! 

This bench was not gonna work, it was like $800 and purple velvet.  But the idea was in my head and I came right home and told Aaron what I wanted.  Now I can give you a solid tutorial on how to UPHOLSTER the bench, but I can not really give any one a guide to building one - I leave that up to Aaron.  These types of projects are always a team effort on that front.  So you can proceed in doing the same thing in one of two ways: find a bench at a vintage store or resale shop and upholster it or attempt building one (I can say that this one was not difficult).

Aaron is quite adept at building me things that I come up with, but I really couldn't tell you how.

Aaron is quite adept at building me things that I come up with, but I really couldn't tell you how.

Step 1: Prep and materials

Once you have a bench you want to work with, you will want to detach the seat from the legs and remove any existing upholstery.  If you can not remove the seat from the legs, I would suggest purchasing a piece of wood, cutting it to size to attach directly on top of the existing bench instead of trying to work around the legs - I promise it won't look good and you won't be happy with it.

Here is what you need for making an upholstered bench:

Before getting started you will want to pick out a fabric that you like and have it ready before assembling your supplies.  To figure out how much fabric you need will depend on three things: the length and width of your bench seat and what size foam you are adding. 

This is what Aaron made - the top layer of plywood is not yet attached to the frame and legs.  After we upholster it, he will attach it with L-brackets.

This is what Aaron made - the top layer of plywood is not yet attached to the frame and legs.  After we upholster it, he will attach it with L-brackets.

Here is how you will calculate it: 1) measure the surface area of your bench (length and width, this case the bench is 54 inches long and 20 inches wide), 2) measure the height of your base (the piece of wood you are attaching the foam too, in my case it was 3/4 inch ply) and add it to the thickness of the foam you are adding on top (in my case, 6 inches), so my sides are about 6.5 inches high.  Your fabric will need to cover the entire surface and generously tuck underneath to be stapled.  So I would need a piece that is at least 60.5 (54 + 6.5) inches long and 26.5 (20 +6.5) inches wide, plus extra for stapling.  Let's add a generous 10 inches to ensure you have enough to tuck into the tufts and staple: Now you need a piece that is 80.5 inches long, 60.5 + 20 (10 for each end), and 46.5 inches wide.

Most upholstery fabrics are sold on bolts that are already 50 or 52 inches wide, so I was going to be fine on width, so I calculated my yardage based then on the length I needed.  80 inches is 2.22 yards so I rounded up to ensure that I would have plenty of extra to make the buttons, I bought 2.5 yards and was ready to go.

The last things I would recommend doing (if you have kids or pets) and are making something that can't be washed, is to Scotch Guard it before working.  Scotch Guard is most effective with two coats that are well soaked and dried between applications.  So buy a can or two of Scotch Guard and treat the fabric twice and allow it to dry completely before starting.  You can always add more coats later, after you have upholstered but this makes sure you don't miss an inch.

Step 2: Foam and batting

Now that you have your materials together and your fabric ready, you are ready to go.  Take the wood base of your bench and place your foam on top of it and using a serrated knife (like a long bread knife) trim around the base to make sure its flush.

Then, using your T-square or yard stick and a sharpie you will want to make a grid on the wood and the foam to mark where you want your buttons to go.  I divided the short side of my bench into four sections (6-4-4-6 inches) so there was an extra on each end. Then to ensure my buttons were evenly spaced apart, I made each end section start 6 inches in and then marked every 4 inches.  Once the lines are drawn, mark with big x's or circles which intersections will have buttons - they should alternate like checkers.  The outer two on the first row, then the center one on the second row, then the outer two on the third row, and so on.

Using your drill, make small pilot holes in the button spots on the wood base.  Then, using an Xacto knife cut wide x's across the button spots in the foam and cut out a small circle in the middle (about half the diameter of your buttons) - See photo below.

These cuts will allow train the fabric to fold in the right places when you are tufting.  It will also mean there is less resistance against your fabric and will be easier on the fabric long term.

These cuts will allow train the fabric to fold in the right places when you are tufting.  It will also mean there is less resistance against your fabric and will be easier on the fabric long term.

Next, attach your foam to your base.  Place the base, pilot holes UP, onto your work surface.  Spray the top (the side with the pilot holes) with a light coat of spray adhesive.  Then place your foam, button holes side UP also, carefully on top of the wood, making sure that your holes line up.  You should be able to push your finger through the foam button hole and feel the pilot hole below it.

Finally, lay down the batting.  Unroll the batting and play it on top of the foam in one layer.  Trim off the excess with scissors - you will need enough to tuck underneath each side and be stapled to the bottom.

I poked my finger through each of the pilot holes and stuffed a tiny bit of batting in, training it so it wouldn't bunch when I added the fabric.

I poked my finger through each of the pilot holes and stuffed a tiny bit of batting in, training it so it wouldn't bunch when I added the fabric.

Step 3: Fabric and tufting

Next, you will lay your piece of fabric on top of the batting, exactly the same way.  Starting in the middle, you will drill a screw with a washer down through all the layers into the pilot hole. 

Aaron says to make sure your drill torque is LOW - "you don't want to drill through and rip everything, you want it to grab the wood and fasten" so go slow, especially at first until you have a feel for it. This will also let you get a sense for how deep you want your tuft - Don't screw the washer all the way to the wood.

Make sure you work from the inside out - so do the button in the middle and then the ones directly to its left, followed by the ones to the right, continuing to alternate until you get to each end.  This will just make sure that your fabric is distributed evenly because each tuft will pull in a bit of fabric.

Step 4: Staple and trim

This part will probably require two people. Carefully, flip the bench over and have one person pull the fabric and batting over the side and onto the bottom of the wood, until it is equally as tight as the fabric between each tuft - you will be able to tell by looking.  Then the second person can staple the fabric and batting onto the wood.

Just like before, start in the middle of a long side and work your way out.

Just like before, start in the middle of a long side and work your way out.

I made one row of staples about an inch from the edge that went through batting and fabric.  Then when it was stapled all the way around, I used scissors and cut the batting back to the staples (as shown above), but not the fabric.  Then I trimmed the fabric to give my self enough to fold the unfinished edge under (like making a seam) and then adding another row of staples. KEEP ALL THE TRIMMED FABRIC!

At the corners, I folded the fabric like I was wrapping a gift and they came out great!

Step 5: buttons

After we were done with the upholstery, I cleaned up and settled down to watch some TV and make the buttons.  The button kit will come with instructions on how to cover the buttons with your chosen fabric.  In my case the fabric was a bit thick so I used some super glue to give the fabric extra hold.

Once all your buttons are covered, apply super glue to the back of each button and around the rim, then put some glue on the washer and screw head you are attaching it to.  Then push it directly down onto the screw and washer - you will feel the metal back of the button hit the screw.  Follow the directions on your glue, and hold the button down as long as the directions say (the Gorilla Glue I used said to hold each piece down for 1 minute and 30 seconds).

We have now had our bench in the front hall for over three months and only one button has popped off - due to a dogs nail getting stuck underneath and popping it off. It did no damage to the fabric or the button and it glued right back in and hasn't budged.  If you are comfortable at sewing buttons, you can definitely sew these on and then secure with glue as well.

Step 6: finish the bench

Since Aaron made the bench, my last step was to stain the frame and legs and then attach the seat with L-brackets.  I chose the Minwax Espresso stain with polyurethane. I applied three coats, according to the directions and allowed it to set overnight before attaching the seat.

I can't say enough how much I love having this bench.  The baskets underneath keep all the shoes corralled - each family member has their own.  Aaron then installed four hooks next to the front door to keep backpacks, coats, scarves, and the like to be organized.  It worked out that we had room for four hooks, too - one for each person also!

Baby Chalkboard Updates: Round 1

I started this tradition two years ago when my first son, Townes, was born.  We were living in our tiny house back then (sometimes I really miss it) and I had painted a half wall in his nursery with chalkboard paint.  Note: I LOVE chalkboard paint.

I had gotten a bunch of Pinspiration from others who had done similar things and this was my version of the chalkboard updates.  I'm not the best about sending photos or taking videos, so posting these on Facebook for my friends and family was an awesome way to share his milestones.  Plus, I knew there was no way I was actually going to fill out his baby book.

Being that I only had one baby and this was a fun creative outlet, I did monthly milestones and holidays.  I changed up the regular pattern on his birthday when I had everyone who attended his birthday party sign his chalkboard, I thought that would make for a special memory (and helped with thank you notes haha). You can also see a progression of my chalk art, approach, and photo editing as time went on.  Sometimes I look back at the early ones and wish I could re-do them, but perfection is pointless. 

One thing I am happy I did was choosing a particular item to photograph him with that was a favorite at the time.  Babies jump from one favorite thing to another so quickly its easy to forget what they were into or a milestone like using their first sippy cup.  Putting those things in the pictures with him will always serve as a reminder of what he loved, even if it was fleeting.

You also might notice that sometime in the summer, the floor magically changes colors.  Not magic.  What happened was, we decided to remodel our tiny 780 sq ft. bungalow into a 2400 sq ft. dream home.  However, part of the collateral damage was Townes' actual wall in his first bedroom (which became Aaron's office). Also, we had to move out of our house and live in a rental for almost a year, and I had to figure out a solution to my continuity issue.

I couldn't very well paint a wall in the rental house with chalkboard paint, landlords tend to frown upon those types of things.  So I did the only logical thing.  I measured the wall exactly, took a picture of the baseboard molding and headed out to Home Depot.  I'm pretty sure every guy there thought I had lost my mind, but I asked that they cut me a piece of MDF to the exact size, and found matching baseboard and had them cut that for me too. 

Back at home, I painted my new "wall" with two coats of Rust-Oleum Liquid Chalkboard Paint (its better than the spray can) and then attached the baseboard to the bottom with wood glue.  All I had to do now was lean it on the wall and plop his Pottery Barn Baby Chair in front of it and no one would know the difference (unless they compared the stain color on the hardwood floors). 

Here are some of the pre-edit photos so you can get an idea of what a difference good photo editing can do.  Nowadays I use my favorite app on my phone, Aviary, but at the time I was just using what tools were available to me in iPhoto.  When taking the photo here are a few tips to make sure they turn out great.

  • Keep it straight and level: I used to place my camera on an board book on an ottoman away from Townes and used a remote to shoot the photos (I used this really simple one from Precision). You want the camera to be straight on to your little ones face, make sure you aren't shooting from higher up; that may mean your camera only needs to be 18 inches off the ground, so use a little tripod or a stool. Before even bringing your baby in, you can make sure the camera is set to capture the whole space you need and that the floor is straight and level in the photo, this will give you the most to work with when cropping later.  It will also keep the camera steady and makes the photos look more consistent month to month.
  • Shoot, shoot, shoot: Set your camera to a rapid shooting setting.  This will allow you to just keep clicking the shutter button on your remote and gives you the most options to choose from (see photo to the right).  Make sure your camera is on auto-focus so they aren't blurry (though if your kiddo is making crazy moves that can't be helped) and it will focus before shooting.
  • Focus on your baby: Don't worry about trying to get a perfect picture.  Once your camera is set, bring in your baby and don't worry about the camera.  Kids will give you laughs and giggles if you just set them where you need them and keep eye contact with them and make funny faces, play their favorite songs, etc.  If you try to goad them into saying cheese or looking at the camera you may both end up frustrated.  Stay out of the frame, but just worry about your little one, I promise you will have a photo you love.
  • Edit: Once you have your photos, pick the one you feel makes you the happiest.  The one that embodies your kiddo at the time. Then let the magic of digital editing take it to the next level.  Crop it to the same size every month, and then adjust your brightness, color, saturation and tint, or add a filter - the more your experiment with your editing tools the better you will get and you will find what you like. Almost every photo editor should have a "straighten" or "align" option - make sure your baseboard or floor is level to the bottom of your photo!  I was even able to edit out the power outlet on the wall with the "blemish" tool.